Enhance Your Databricks Workflow
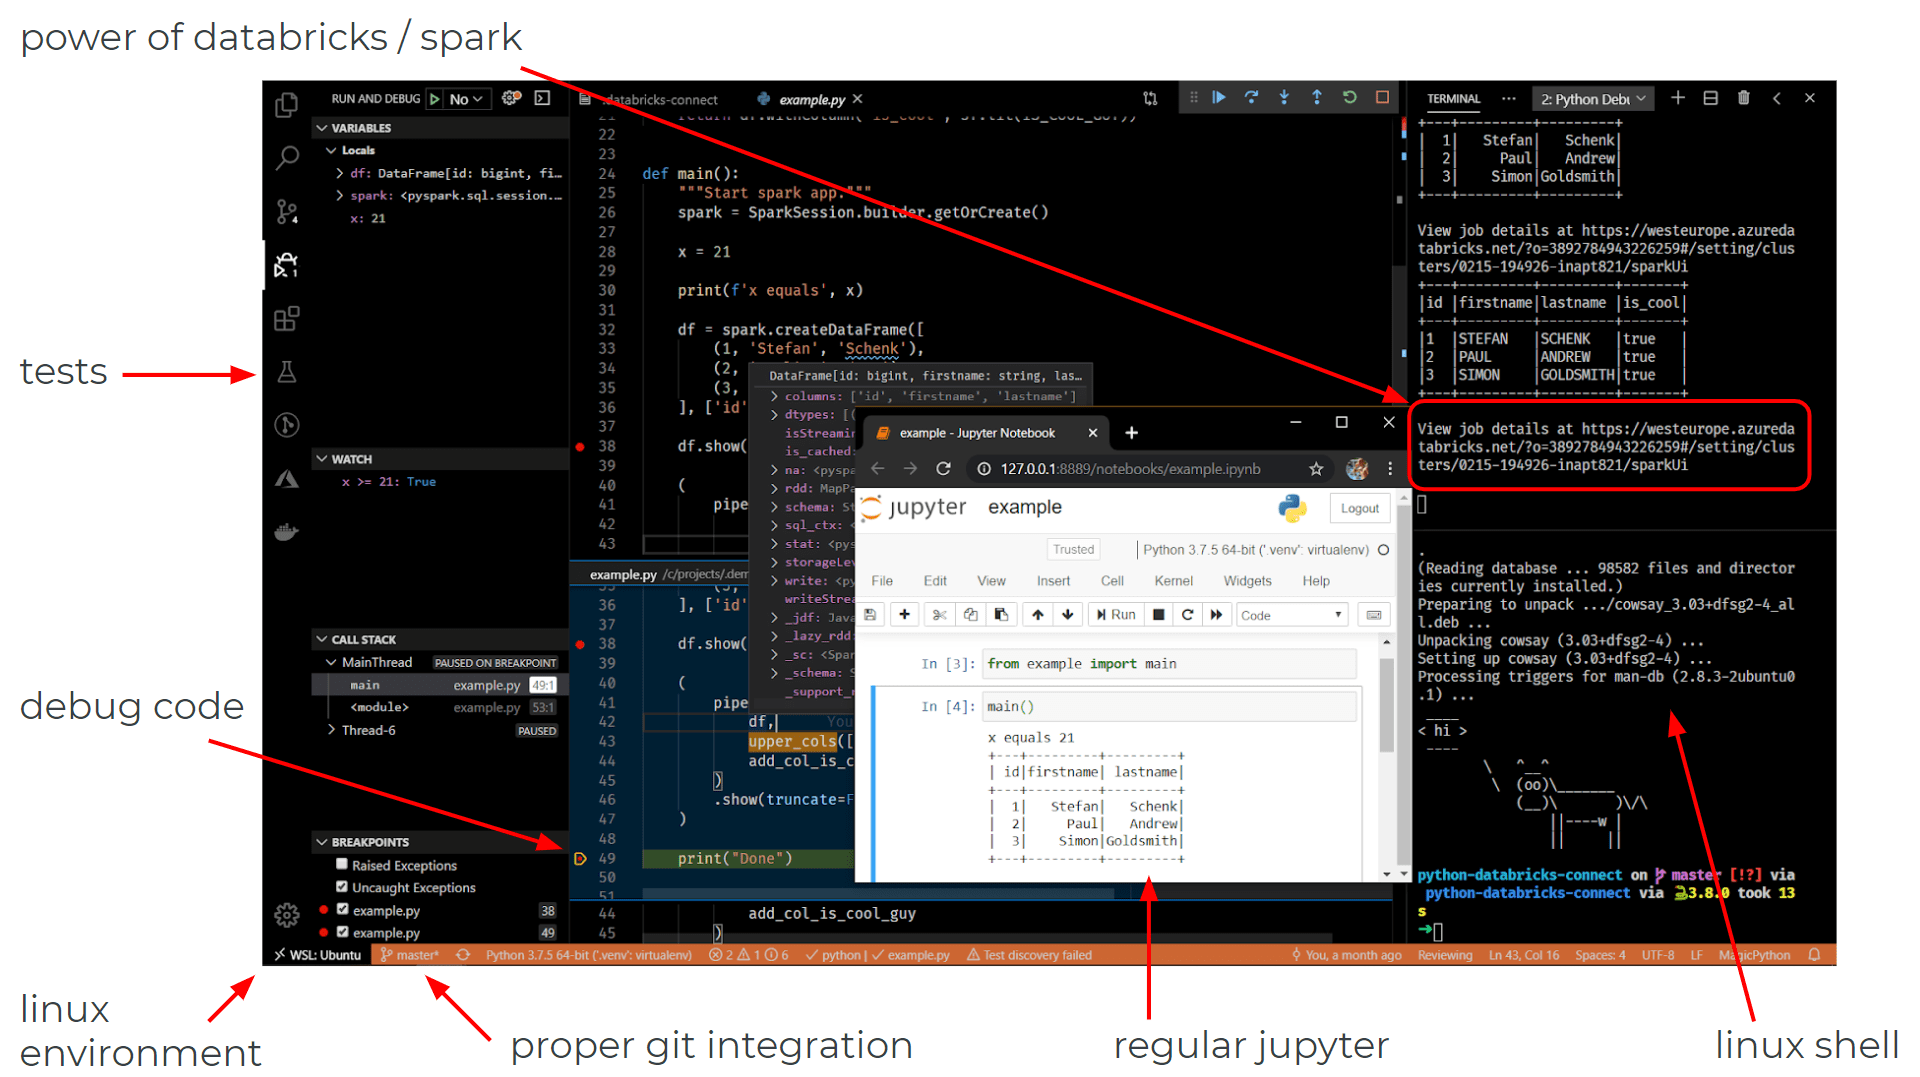
With databricks-connect you can connect your favorite IDE to your Databricks cluster. This means that you can now lint, test, and package the code that you want to run on Databricks more easily:

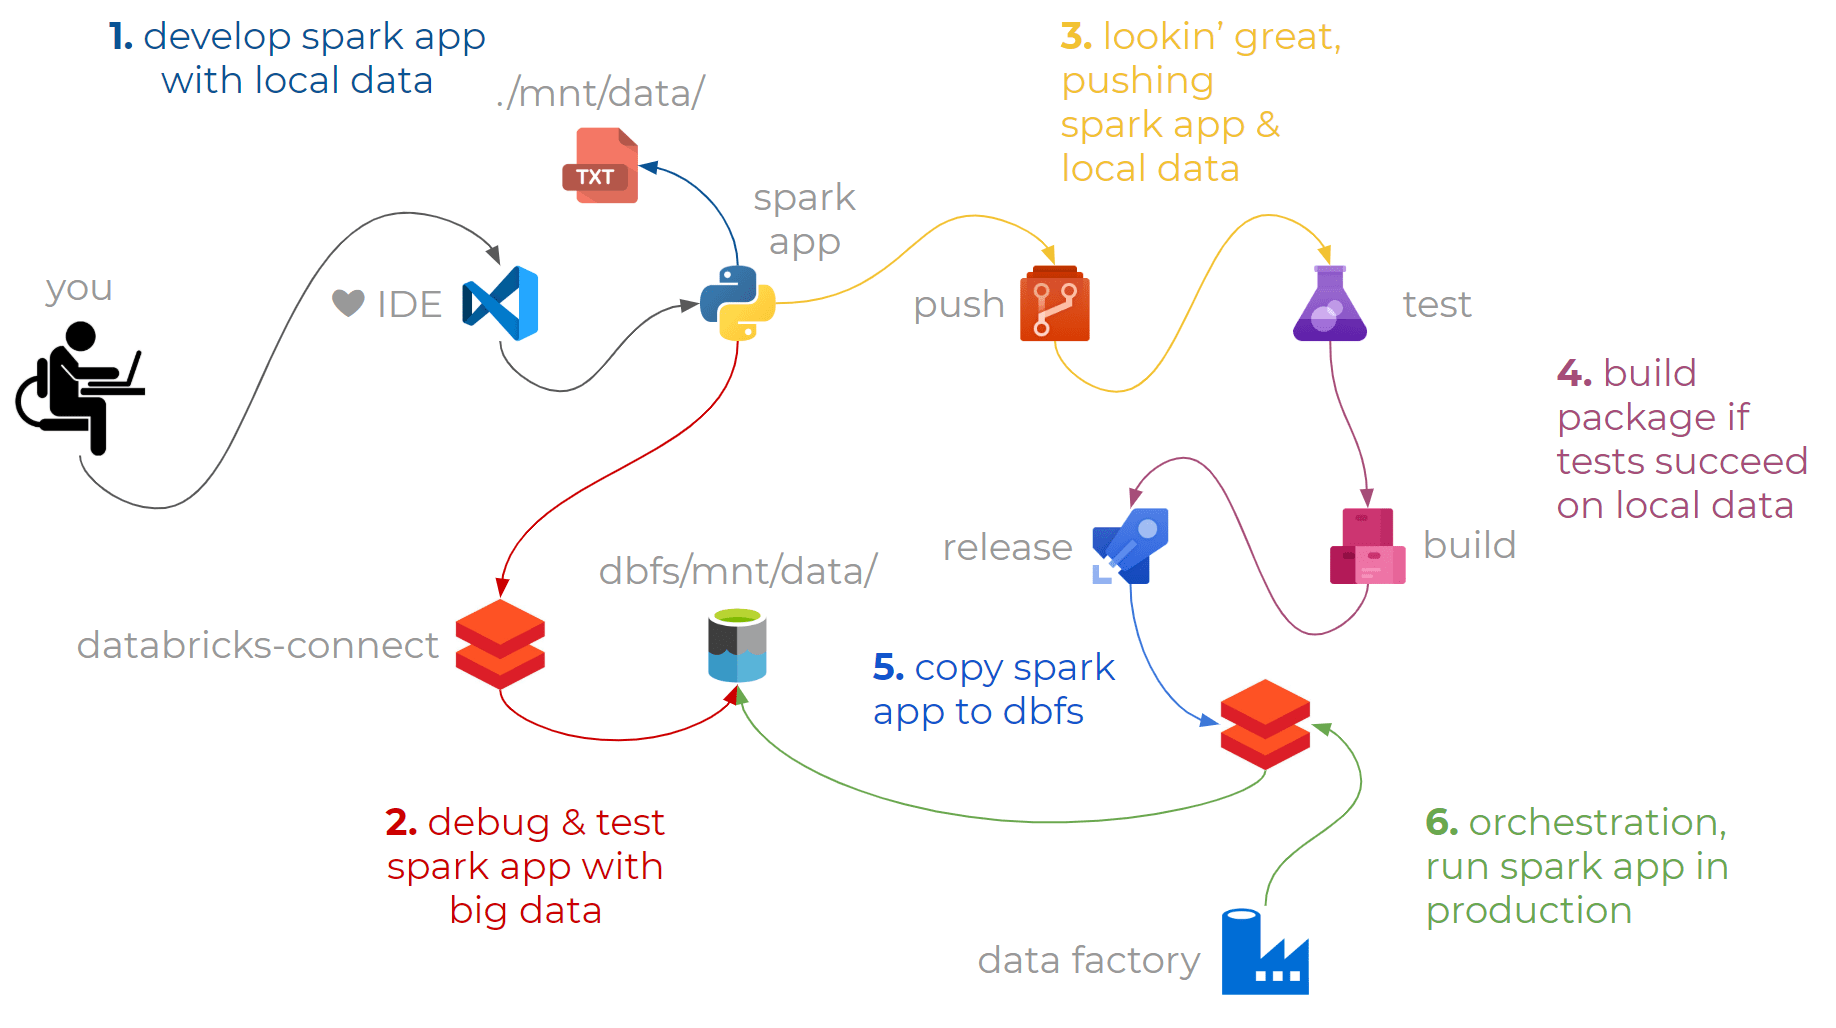
By applying ci-cd practices you can continuously deliver and install versioned packages of your python code on your Databricks cluster:

All you need is vscode, a databricks workspace, a storage account, and data factory to follow along with this post.
Topics
- Local Setup
- Remote Setup
- Package the Spark App
- Test the Spark App
- Build the Artifact
- Copy the Package to DBFS
- Run the Package on Databricks Using Data Factory
1. Local Setup
 ⟶
⟶ 
Let’s create a small example spark app.
Create a project folder demo-project and install pyspark inside a new virtual environment:
mkdir demo-project && cd demo-project
pipenv install pyspark --python 3.
pipenv shell
Create a sample data file mnt/demo/sampledata.csv containing:
id, firstname, lastname
1, Stefan, Schenk
Create a python file src/demo/main.py:
import sys

from pyspark.sql import SparkSession
from pyspark.sql import functions as sf

def main(filepath, value):
    """Read in data, add a column `added_column`."""
    spark = SparkSession.builder.getOrCreate()

    return (
        spark.read
        .option('inferSchema', True)
        .csv(filepath, header=True)
        .withColumn('added_column', sf.lit(value))
    )

if __name__ == "__main__":
    value = sys.argv[1]
    main('mnt/demo/*.csv', value).show()
Run the script to see if it works:
➜ python src/demo/main.py 🐌🚬😁🤦♂️
+---+----------+----------+------------+
| id| firstname| lastname|added_column|
+---+----------+----------+------------+
| 1| Stefan| Schenk| 🐌🚬😁🤦♂️|
+---+----------+----------+------------+
It’s quite basic, but it’s good to start small.
2. Remote Setup
 ⟶
⟶ 
From here on, we will make things more interesting.
-
Install databricks-connect in your virtual environment.
-
Create a new blob container in your storage account named
demo, and upload themnt/demo/sampledata.csvfile. -
Use this utility notebook to mount the demo container in your databricks workspace.
-
Run the following code in a notebook cell to see if you can list the data file:
%fs ls mnt/demo
Run your python script again (this time it should run on Databricks):
➜ python src/demo/main.py 🐌🚬😁🙋
20/02/26 23:49:32 WARN Utils: Your hostname, ANL-SS14 resolves to a loopback address: 127.0.1.1; using 172.17.160.1 instead (on interface eth1)
20/02/26 23:49:32 WARN Utils: Set SPARK_LOCAL_IP if you need to bind to another address
20/02/26 23:49:33 WARN NativeCodeLoader: Unable to load native-hadoop library for your platform... using builtin-java classes where applicable
Using Spark's default log4j profile: org/apache/spark/log4j-defaults.properties
Setting default log level to "WARN".
To adjust logging level use sc.setLogLevel(newLevel). For SparkR, use setLogLevel(newLevel).
20/02/26 23:49:35 WARN MetricsSystem: Using default name SparkStatusTracker for source because neither spark.metrics.namespace nor spark.app.id is set.
View job details at https://westeurope.azuredatabricks.net/?o=3892784943666666#/setting/clusters/0214-195926-aptin821/sparkUi
+---+----------+----------+------------+
| id| firstname|  lastname|added_column|
+---+----------+----------+------------+
|  1|    Stefan|    Schenk|   🐌🚬😁🙋|
+---+----------+----------+------------+
Cool, we just ran the same code on data in the cloud, using a powerful cluster.
Switch back to using regular pyspark, so we can swiftly develop locally.
3. Package the Spark App
 ⟶
⟶ 
Our next step is to make our python code packageable, so that we can easily install and run it somewhere else.
-
Create an empty
__init__.pyfile in yoursrc/demo/folder. -
Create a
setup.pyfile in your root directory:"""Setup.py script for packaging project.""" from setuptools import setup, find_packages import json import os def read_pipenv_dependencies(fname): """Get default dependencies from Pipfile.lock.""" filepath = os.path.join(os.path.dirname(__file__), fname) with open(filepath) as lockfile: lockjson = json.load(lockfile) return [dependency for dependency in lockjson.get('default')] if __name__ == '__main__': setup( name='demo', version=os.getenv('PACKAGE_VERSION', '0.0.dev0'), package_dir={'': 'src'}, packages=find_packages('src', include=[ 'demo*' ]), description='A demo package.', install_requires=[ *read_pipenv_dependencies('Pipfile.lock'), ] )Read more about these
__init__.pyandsetup.pyscripts here. -
Install your code as an “editable” package in your virtual environment:
pip install -e .This means that whenever you edit your python files, the installed package will include the changes, making development easier.
You will now be able to import from your package:
➜ python Python 3.7.5 (default, Dec 3 2019, 12:09:43) [GCC 7.4.0] on linux Type "help", "copyright", "credits" or "license" for more information. >>> from demo.main import main >>> main <function main at 0x7f086af5cc20> -
Build a distributable wheel – using the same script – by running:
python setup.py bdist_wheelA
dist/folder will have appeared, containing the.whldistribution.
We will utilize this packaging capability in our build pipeline, to create a new artifact whenever we push new changes to the repository.
4. Test the Spark App

But before we build anything, we want to make sure that our code-style is acceptable, and that new changes have not broken any existing code. Testing should be part of your databricks workflow.
-
Create a new python file
tests/demo/test_main.pycontaining the following code:"""Test main module.""" from python_package.main import main def test_main(): """Test whether main function works.""" expected_value = '👍🤞👌🐌' assert all([ row.added_column == expected_value for row in ( main('mnt/demo/*.csv', expected_value) .select('added_column') .collect() ) ]) -
Run the test:
pytest
By running the test we have verified that every single row had the value 👍🤞👌🐌 in the column called added_column. If someone accidentally modified the code, the tests (that we will run in our build pipeline) will fail, ensuring that the broken code never reaches production.
You would also be able to add something called doctests to your functions as examples for fellow developers who make use of your functions (example).
In addition to tests, you should make sure that the code style is acceptable by running a linter over your code.
-
Install the python vscode extension, and set up
mypyandflake8forvscodeto highlight code-style issues (example). -
Run the following commands to analyze your code:
mypy src --ignore-missing-imports
flake8 src
We will also run these commands in our build pipeline, any errors will cause the pipeline to fail until the code has been cleaned up again.
Everything seems ready to be shipped to production.
5. Build the Artifact

We will now start applying ci-cd practices to continuously release our code onto Databricks (continuous delivery / continuous deployment).
We’ll automate the process of testing and building our final package by using an Azure DevOps pipeline (example).
Create a file azure-pipelines.yml in your root directory:
resources:
  - repo: self

trigger:
  - master
  - refs/tags/v*

variables:
  python.version: "3.7"
  major_minor: $[format('{0:yy}.{0:MM}', pipeline.startTime)]
  counter_unique_key: $[format('{0}.demo', variables.major_minor)]
  patch: $[counter(variables.counter_unique_key, 0)]
  fallback_tag: $(major_minor).dev$(patch)

stages:
  - stage: Test
    jobs:
      - job: Test
        displayName: Test
        steps:
          - task: UsePythonVersion@0
            displayName: "Use Python $(python.version)"
            inputs:
              versionSpec: "$(python.version)"

          - script: pip install pipenv && pipenv install -d --system --deploy --ignore-pipfile
            displayName: "Install dependencies"

          - script: pip install typed_ast && make lint
            displayName: Lint

          - script: pip install pathlib2 && make test
            displayName: Test

          - task: PublishTestResults@2
            displayName: "Publish Test Results junit/*"
            condition: always()
            inputs:
              testResultsFiles: "junit/*"
              testRunTitle: "Python $(python.version)"

  - stage: Build
    dependsOn: Test
    jobs:
      - job: Build
        displayName: Build
        steps:
          - task: UsePythonVersion@0
            displayName: "Use Python $(python.version)"
            inputs:
              versionSpec: "$(python.version)"

          - script: "pip install wheel"
            displayName: "Wheel"

          - script: |
              # Get version from git tag (v1.0.0) -> (1.0.0)
              git_tag=`git describe --abbrev=0 --tags | cut -d'v' -f 2`
              echo "##vso[task.setvariable variable=git_tag]$git_tag"
            displayName: Set GIT_TAG variable if tag is pushed
            condition: contains(variables['Build.SourceBranch'], 'refs/tags/v')

          - script: |
              # Get variables that are shared across jobs
              GIT_TAG=$(git_tag)
              FALLBACK_TAG=$(fallback_tag)
              echo GIT TAG: $GIT_TAG, FALLBACK_TAG: $FALLBACK_TAG

              # Export variable so python can access it
              export PACKAGE_VERSION=${GIT_TAG:-${FALLBACK_TAG:-default}}
              echo Version used in setup.py: $PACKAGE_VERSION

              # Use PACKAGE_VERSION in setup()
              python setup.py bdist_wheel
            displayName: Build

          - task: CopyFiles@2
            displayName: Copy dist files
            inputs:
              sourceFolder: dist/
              contents: demo*.whl
              targetFolder: $(Build.ArtifactStagingDirectory)
              flattenFolders: true

          - task: PublishBuildArtifacts@1
            displayName: PublishArtifact
            inputs:
              pathtoPublish: $(Build.ArtifactStagingDirectory)
              ArtifactName: demo.whl
When you scan through the file, you’ll see some commands that are called using a Makefile, add this file to your root directory:
lint:
	mypy src --ignore-missing-imports
	flake8 src --ignore=$(shell cat .flakeignore)

dev:
	pip install -e .

test: dev
	pytest --doctest-modules --junitxml=junit/test-results.xml
	bandit -r src -f xml -o junit/security.xml || true
Create a new repository here, then commit and push your code.
In Azure DevOps create a new build pipeline, select your azure-pipelines.yml file, and click “Run”. If everything goes well, an artifact will be created:

6. Copy the Package to DBFS
 ⟶
⟶ 
Next, create a new release pipeline in Azure DevOps. Choose to start with an “Empty job”.
-
In the artifacts section, add your demo build.
-
Click on the small bolt icon, and enable continuous-deployments. As a filter include the
masterbranch.
-
In the first stage, add a new task by searching for “Databricks files to DBFS”, you may have to install this task from the marketplace. Enter the following values:

-
Finally, create a new Databricks token, and add it to a variable in your release pipeline:

-
Trigger the release pipeline, and take a look inside your
/librariesfolder on DBFS, you should see your package there:
Whenever the package has successfully been built, this release is triggered, which will copy the artifact to DBFS, where Databricks notebooks will be able to pick it up and install it.
7. Run the Package on Databricks Using Data Factory
 ⟵
⟵ 
As our orchestration tool, we’ll use Data Factory. We’ll be able to pass the dependencies and arguments to our Databricks notebook, which then runs our package.
-
Create a “runner” notebook that takes two arguments:
filepathandvalue:# Databricks notebook source # MAGIC %md # Runner # COMMAND ---------- dbutils.widgets.text('filepath', '') filepath = dbutils.widgets.get('filepath') # COMMAND ---------- dbutils.widgets.text('value', '') value = dbutils.widgets.get('value') # COMMAND ---------- from demo.main import main main(filepath, value).show() -
In Data Factory, create a new “compute” Databricks Linked Service:

-
Create a new pipeline, and add a Databricks activity. Add the path to your package as a
wheellibrary, and provide the required arguments:
-
Press “Debug”, and hover over the job run in the Output tab. Then click on the glasses icon, and click on the link that takes you to the Databricks job run.

And that’s it! Let me hear your feedback in the comments below 😃👍🐌🎈.


